In this quick tutorial, we will work on how to configure automatic dark mode for Home Assistant. It works with any theme and Lovelace interface as long as you have a dark and light version of the preferred theme. It’s easy to set up and a nice feature for wall-mounted tablets or the mobile interface. I use it primarily with my wall-mounted Fire Tablet.

With a single automation, we can setup an easy but effecive auto dark mode for Home Assistant. Left is an example interface during the day, right is the interface in the evening.
Getting a dark mode theme
To set up a dark mode, we will need two themes: one for the day/light theme, and one for the dark mode. In my setup, I make use of the “Google theme” which conveniently has both a light and dark version. You are of course free to select two different themes.
You can install the themes using HACS or by adding them to the frontend section of your configuration.yaml like so:
frontend:
  themes:
    Google Dark Theme:
      app-header-background-color: "#171717"
      app-header-text-color: "#BDC1C6"
      # .. rest of theme here
    Google Light Theme:
      app-header-background-color: "#F8F8F8"
      app-header-text-color: "#424242"
      # .. rest of theme here
Configuring users
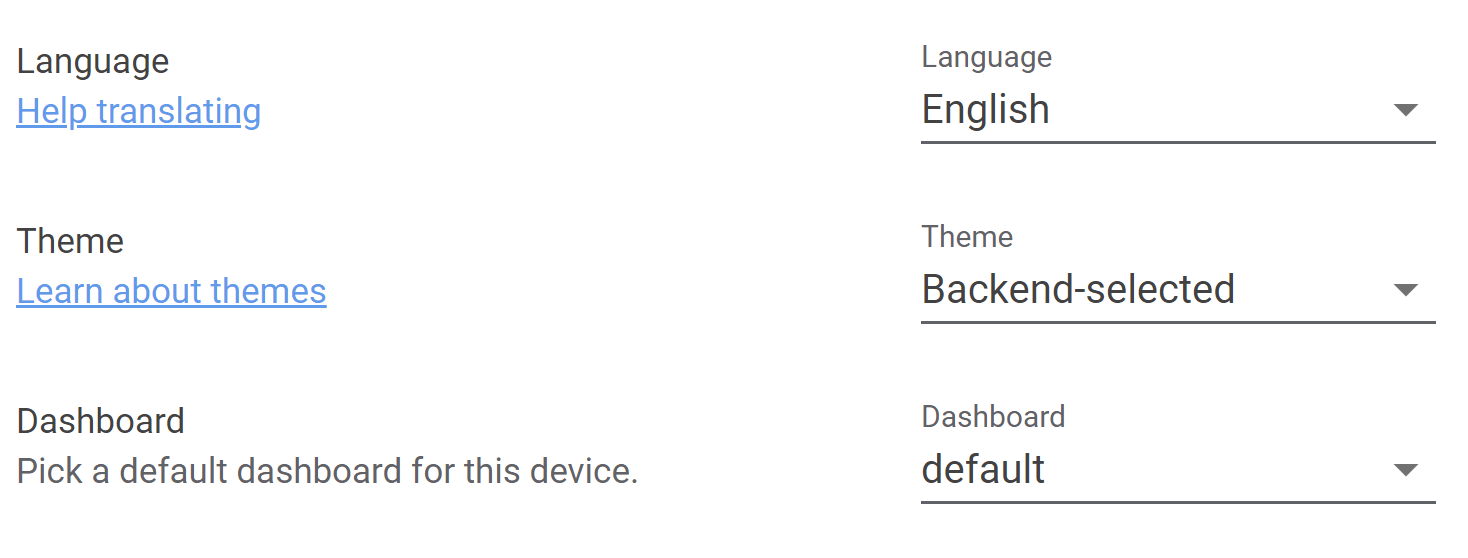
Next, we need to make sure that we can change the theme for the users. For each user that you have configured for HA, or each user you want to enable dark mode for, go to their profile page and select “Backend selected” as their theme. “Backend selected” makes sure that we can set the theme of a user programmatically using an automation.

Make sure that all users have set their theme to backend-selected.
Creating the automation
With the theme and users setup, the only thing left is to create the automation. The automation is quite simple, based upon the state of the sun integration (which is auto-enabled), we set the correct theme. If you would prefer to start dark mode at a fixed time, you could also replace the sun trigger by a time trigger. To make sure the correct theme is always loaded, we also run the automation when HA starts up.
automation:
  # Set the correct theme during day and night
  - alias: Automatic Theme Change
    trigger:
      - platform: homeassistant
        event: start
      - platform: state
        entity_id: sun.sun
    action:
      - service_template: frontend.set_theme
        data_template:
          name: >
            {% if is_state('sun.sun', 'above_horizon') %}
              Google Light Theme
            {% else %}
              Google Dark Theme
            {% endif %}
That’s it! After adding the automation, reload Home Assistant and you should have automatic dark mode from now on. Overall, this is a very simple but rewarding automation. I mainly installed it for my wall-mounted tablet, which now blends in way more during the evening (see my post on my hardware setup for more information).
Series on Home Automation
This post is part of a series of posts on Home Automation. These posts usually cover a part of my own smart home or a project I worked on. I make heavy use of Home Assistant, Node-RED and AppDaemon to control my home; these posts are examples of this.
Interested in my setup?
Home Automation hardware setupOther posts in this series
Interested in Home Automation, Home Assistant or Node-RED? I have a few other posts that might be of interest:
Home Automation / Home Assistant setup with recommended hardware: The four-year update
Overview of my current hardware for my smart home powered by Home Assistant. An update on my previous post of four years ago (!) when I had just started with home automation.
Automatically turn on tv when streaming to a Chromecast
Quick Node-RED tutorial on automatically turning on a TV when streaming media.
Local face recognition for Home Assistant using TensorFlow.js, Part 2: Learning to recognize faces
Second post of my series on face recognition for presence detection in Home Assistant. In this post, I create a face recognition system.
