In this blog post I’ll show my latest project: a custom built external water bath monitor for my sous vide setup. It runs on a Spark Core and makes use of the DS18B20 temperature sensor. Not sure what sous vide is? Its an essential cooking method in the modern cuisine! I’ll start of with the hardware aspect of the project. Next time I’ll focus on the software and programming my new device.
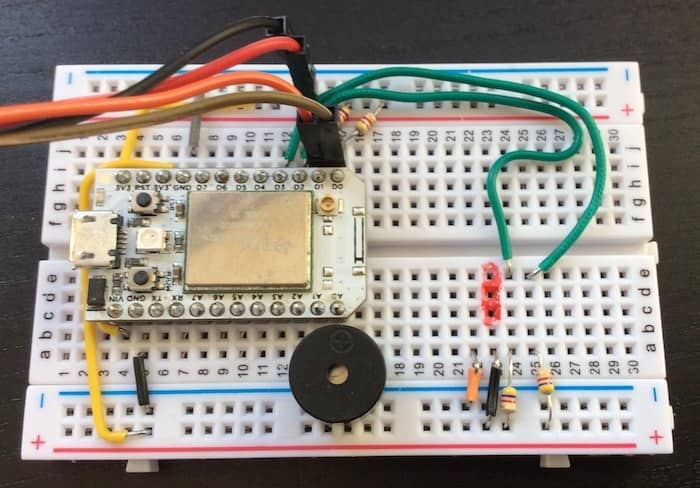
First version of the circuit on a breadboard. Only difference with the final version: I eventually used one pin for both the temperature sensors (see the previous diagram).
Background
Sous vide cooking is perfect for (extreme) long cooking times and can transform a cheap cut of meat to a steak-like quality. Roast beef is a nice example of this. Instead of using an oven you cook the roast for 12-24H in a water bath to make it tender.
A constant and accurate temperature of the water bath is of extreme importance in sous vide. To high and the meat is ruined. To low and your meat can become spoiled (below 54 °C is the danger zone). For recipes that only take a few hours you can watch the cooking process and regularly check whether everything is ok. But, how about those long multiple day projects? Being awake for 24H will probably not do any good.. 😄
There are many things that can go wrong (power malfunction, water level to low, etc.) with a shutdown due to evaporation being the most probable. Usually some kind of monitoring is required to assure a successful end result. In fact, the last time I did this my sous vide cooker broke down at random intervals which required me to check it every hour or so. To prevent me getting up in the middle of the night checking on my cooking process, I came up with a solution: an external water bath monitor!
In this post I’ll show you the system that I built: a device, independent of my sous vide setup, that monitors and reports to me when anything suspicious occurs.
Design considerations
As said, temperature is central to sous vide cooking. I simplified my problem by arguing that (almost?) every (negative) event that can occur will have an effect on the temperature:
- Water level to low? → Sous vide device stops and temperature decreases.
- Something wrong with the circulation? → The water bath will have different temperatures at different points. Or only has the correct temperature close to the device.
- Power problem? → No heating, so temperature decreases.
- Someone took the food out? → Well, if they have very cold hands the temperature will drop. 😉
In other words, if we monitor temperature and report any changes we can catch most events that occur!
I started my search and came across the DS18B20 temperature sensor which is available in a waterproof version: perfect for monitoring the temperature of a sous vide water bath! For example available through the Adafruit store. It has a PVC tube which doesn’t make it food-safe, but it won’t come into contact with food as everything is packaged in bags.
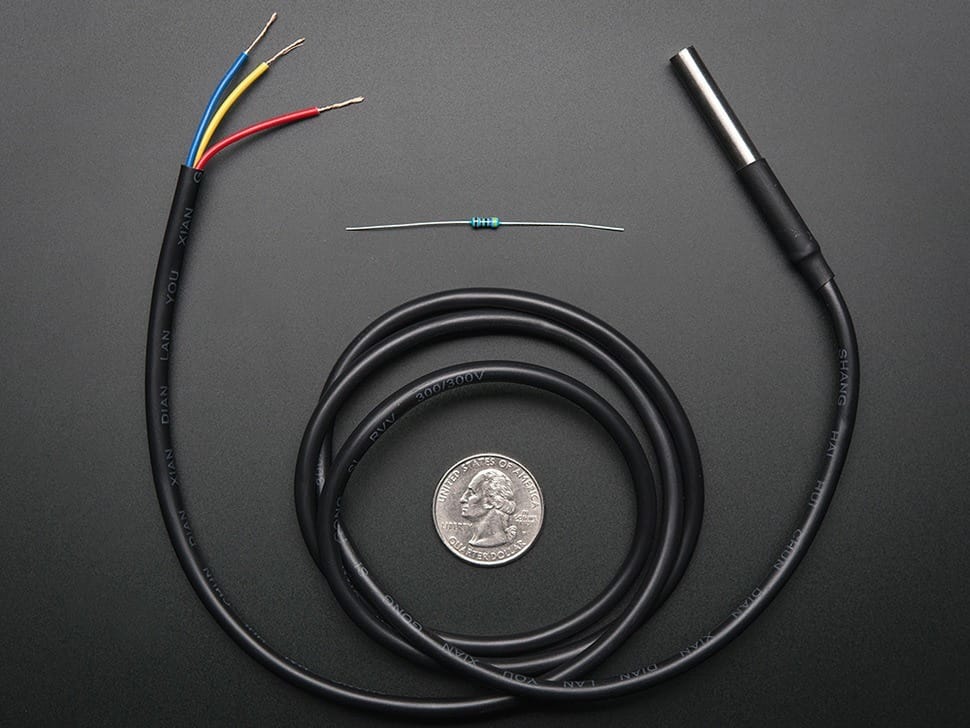
DS18B20 in waterproof package.
Second part is the reporting. I want to know, even when away from home, when something goes wrong. So, anything that can show the current status of the system on my phone would be great. Luckily, I had a Spark Core laying around from the original Kickstarter they did. It has WiFi support so that covers the reporting part of the system.
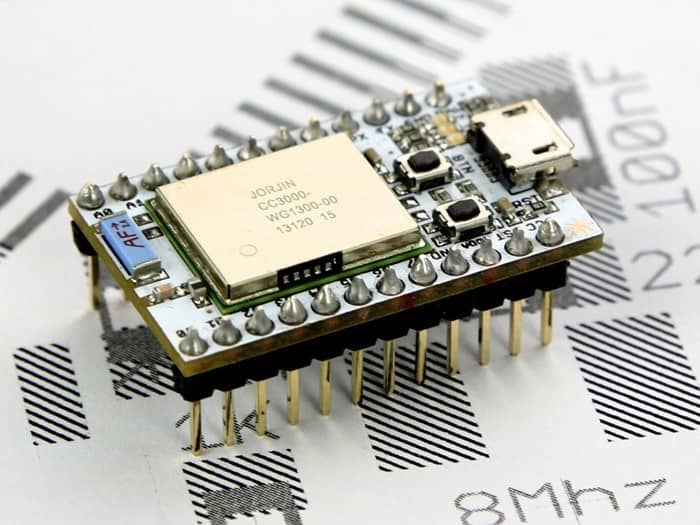
Original Spark Core (with built in antenna). I used the external-antenna version.
Hardware overview
Besides the Core and the two temperature sensors I also added some parts for direct feedback (as opposed to indirect using WiFi). I ordered a two-line lcd screen to show the current temperature and a buzzer to alert me when something is wrong. The full list of electronic components:
- 1x Spark Core, with external WiFi antenna
- 2x DS18B20 waterproof version
- 1x Regular buzzer
- 1x Blue Backlight LCD, with I2C interface
- 3x 4.7k resistor (for pull-up)
Powering the Core (and other components) is done directly through USB.
Circuit
The circuit is fairly simple as the component list is short. We do however need to separate the 5V and 3.3v power lines.
Both temperature sensors are connected to a digital pin (D3) on the Spark Core with a pull-up resistor (4.7k) to the 3.3v pin. They will use the Dallas OneWire library so multiple sensors can work with a single pin. The LCD screen uses I2C and is connected to the corresponding SCL and SDA pins on the Core (which are D0 and D1). As the LCD screen needs 5V to work, its Vin pin is connected to Vin of the Core (which is 5, directly from the USB). Both I2C pins have a pull-up resistor to Vin.
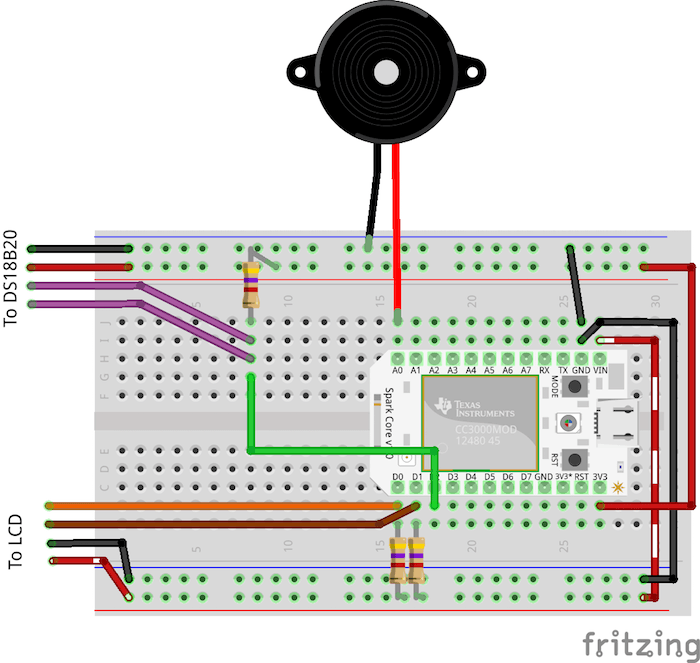
Final version of the circuit. Note that the two power lines on the breadboard have a different voltage. The lower one is connected to Vin (5v), the top one to Vcc (3.3v).
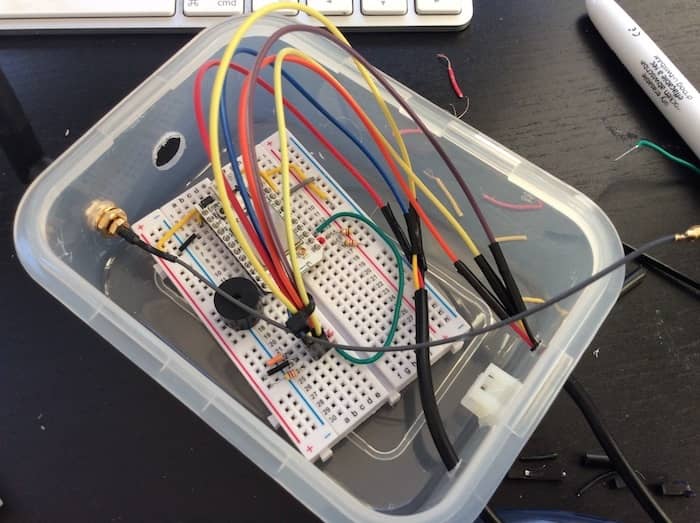
I installed the whole circuit on a breadboard. For a moment I considered perfboard but I first want to do some more test runs before making the circuit really fixed.
First version of the circuit on a breadboard. Only difference with the final version: I eventually used one pin for both the temperature sensors (see the previous diagram).
Building the device
As the monitor will be placed in my kitchen I looked for a simple enclosure that is watertight. I found my solution in a very simple food container that has an air tight seal. I drilled a few holes in the bottom for the sensors, USB cable and WiFi antenna:
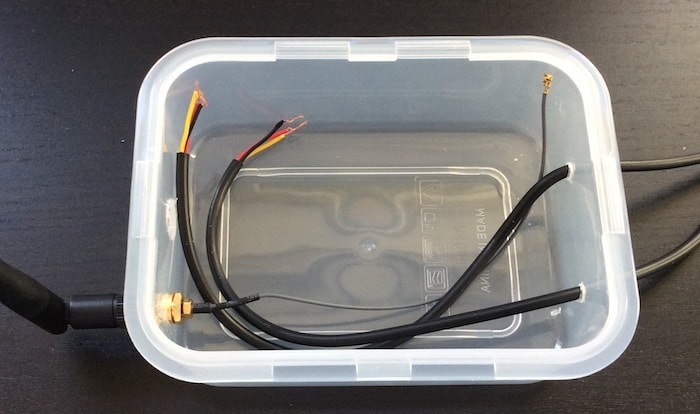
Enclosure of the Sous Vide Monitor. On the left is the external WiFi antenna. On the right are the wires of the two temperature sensors.
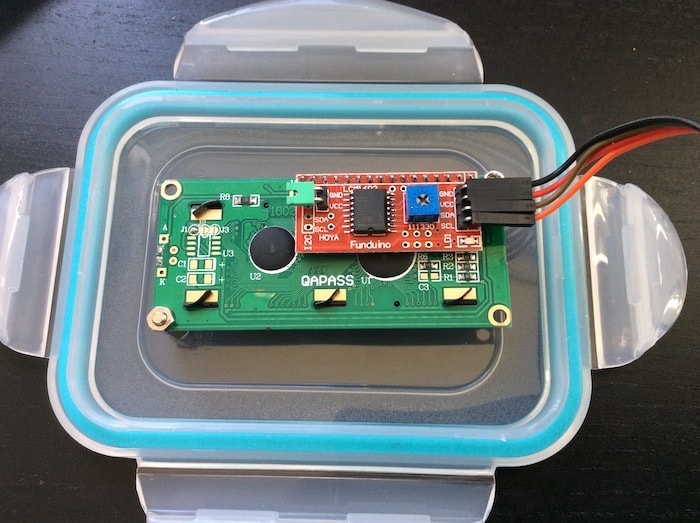
Lid of the enclosure with air-tight seal. The LCD screen is mounted directly on the lid.
The full circuit fitted in nicely. The holes for the temperature sensors are filled with hot glue as these have the highest risk of letting some water in.
With all the cables fitted I added the breadboard to the enclosure and tidied all the cables. The cables of the sensor and LCD are not permanently attached to the board so that I can remove various parts. Tie wraps and some brackets are a lifesaver in these kind of situations. The end result is a very small packet with the two temperature sensors probing out:
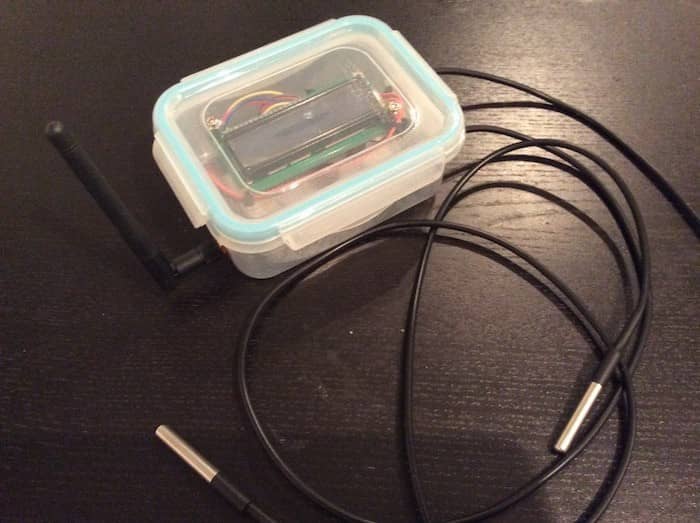
Final product after all components have been installed. Only missing is the USB cable for power.
So that’s that! My two-channel monitor is complete and I am really happy about how it turned out. The total build cost me around two afternoons, including some programming and testing. I can now monitor two water baths or a single bath at two points (usefull for large containers).
Next step? Software! But, I will cover that in the next post.